Showing posts with label page. Show all posts

Thursday, 13 September 2018

Background Utility Items in Winter 19

Background Utility Items in Winter 19

Introduction

The Winter 19 release of Salesforce introduces the concept of Background Utility Items, Lightning Components that are added to the Lightning Experience utility bar but don’t take up any real estate, can’t be opened and have no user interface. This is exactly what I was looking for when I put together my Toast Message from a Visualforce Page blog - the utility bar component that received the notification to show a toast message doesn’t need to interact with the user, but still has an entry. The user can also click on the item and receive a lovely empty popup window:

Screen Shot 2018 09 08 at 08 09 52

Not the worst user experience in the world, but not the best either. I guess in production I’d probably put a message that this item isn’t user configurable. One item like this isn’t so bad, but imagine if there were half a dozen - a large chunk of the utility bar would be taken up with items that only serve to distract the user, although I’d definitely loo to combine them all into a single item if I could.

Refresher

In case you haven’t committed the original blog post to memory (and I’m not going to lie, that hurts), here’s how it works:

Toast


I enter a message in my Lightning component, which fires a toast event (1), this is picked up by the event handle in the Visualforce JavaScript, which posts a message (2) that is received by the Lightning component in the utility bar. This fires it’s own toast event (3) that, as it is executing in the one.app container, displays a toast message to the user.

Implement the Interface

Removing the UI aspect is as simple as implementing an interface - lightning:backgroundUtilityItem. Once i’ve updated my component definition with this (and changed the domain references to match my pre-release org):

<aura:component 
    implements="flexipage:availableForAllPageTypes,lightning:backgroundUtilityItem" 
    access="global" >

    <aura:attribute name="vfHost" type="String"
             default="kabprerel-dev-ed--c.gus.visual.force.com"/>
    <aura:handler name="init" value="{!this}" action="{!c.doInit}"/>
</aura:component>

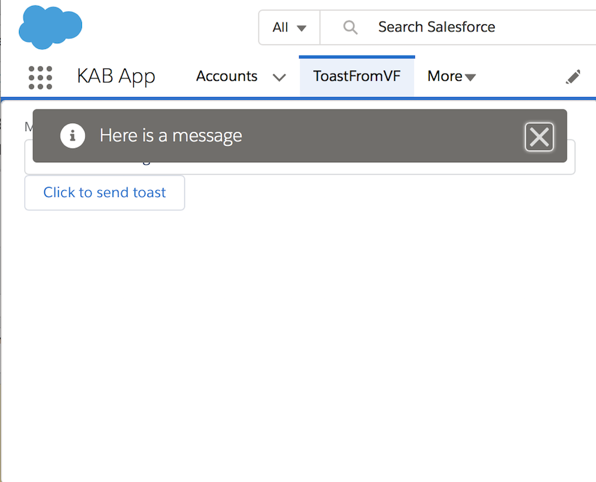
When I open my app now, there’s nothing in the utility bar to consume space or attract the user, but my functionality works the same:

Toast2

You can find the updated code at my Winter 19 Samples github repo.

Related


Saturday, 4 January 2014

Syntax Highlighting in Knowledge Articles

Here at BrightGen we use Salesforce Knowledge for our knowledge base.  The majority of the time the knowledge articles are paragraphs of text with images images, but every now and then we need to include code snippets.

For the purposes of this post I’m using the FAQ article type that is automatically available when knowledge is enabled, and I’ve added a Body custom field that is a rich text area. I’ve created a simple Visualforce page to display the FAQ:

<apex:page standardController="FAQ__kav" showheader="false">
  <p style=“font-size:16px; font-weight: bold;">
<apex:outputField value="{!FAQ__kav.Title}" />
  </p>
  <apex:outputField value="{!FAQ__kav.Body__c}" />
</apex:page>

and then configured this as the channel display for the article type when accessed through the internal app:

Screen Shot 2014 01 03 at 09 06 47

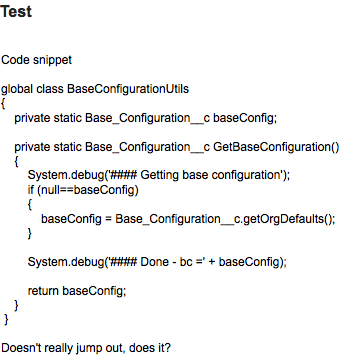
Simply dropping some code into the rich text area doesn’t make it stand out particularly well from the enclosing text:

 Screen Shot 2014 01 03 at 09 24 01

The HTML pre formatted tag <pre> displays the markup in a fixed-width mode, preserving spaces and line breaks to ensure the indentation looks good.  I can add this to my markup by editing the article and clicking the ‘Source’ button:

Screen Shot 2014 01 03 at 09 28 45

this allows me to edit the underlying article HTML and surround my markup with the opening and closing <pre> tags - note that if you simply try to edit the markup dropped in earlier, you’ll see a bunch of &nbsp; and other tags that are preserving the indentation - for that reason I paste the code out of my editor/IDE afresh into the source editor:

Screen Shot 2014 01 03 at 09 35 09

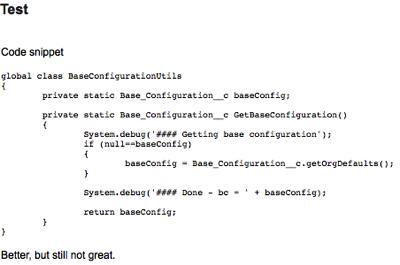
The code now stands out a little more in the article, but still doesn’t look fantastic:

Screen Shot 2014 01 03 at 09 36 46

In order to add syntax highlighting, its clear that I’ll have to look outside of the standard knowledge functionality - I could spend time writing the HTML to highlight each code snippet individually, but that won’t scale and will quickly get boring.

For syntax highlighting on this blog, I use the excellent Syntax Highlighter from Alex Gorbatchev, so this seemed like a good place to start.  Its pretty unobtrusive and relies on adding a style class to the <pre> tag that I’m already using.

First the code needs to be installed - navigate to the Syntax Highlighter home page (http://alexgorbatchev.com/SyntaxHighlighter/) and click the download link near the top right:

Screen Shot 2014 01 03 at 16 23 58

The resulting file can then be uploaded straight into Salesforce as a static resource - I’ve named mine SyntaxHighlighter as I have a great imagination!

My Visualforce page then needs to be updated to pull in the required JavaScript and CSS.  Here I’m including the core highlighter functionality, then the brush that I’m going to use to highlight my code - I like the Java brush so I’m using that, but there are plenty available in the zip file.  This is followed by a couple of CSS files to pull in the core styles and a theme: 

<apex:includeScript value="{!URLFOR($Resource.SyntaxHighlighter,
        'syntaxhighlighter_3.0.83/scripts/shCore.js')}" />
<apex:includeScript value="{!URLFOR($Resource.SyntaxHighlighter,
        'syntaxhighlighter_3.0.83/scripts/shBrushJava.js')}" />
<apex:styleSheet value="{!URLFOR($Resource.SyntaxHighlighter,
       'syntaxhighlighter_3.0.83/styles/shCore.css')}" />
<apex:styleSheet value="{!URLFOR($Resource.SyntaxHighlighter,
       'syntaxhighlighter_3.0.83/styles/shThemeDefault.css')}" />

Next, I have some JavaScript to turn off the toolbar that appears above the code by default and execute the static function to process all elements on the page and highlight as appropriate - it doesn’t matter where this is executed from as it won’t fire until the page has finished rendering:

<script type="text/javascript">
  SyntaxHighlighter.defaults['toolbar'] = false;
  SyntaxHighlighter.all();
</script>

I can then return to my knowledge article and add the java brush class to my <pre> tag by editing the source as described above:

Screen Shot 2014 01 03 at 16 51 39

and now when I access my page my code is highlighted with line numbers:

Screen Shot 2014 01 03 at 16 46 23

One important point to note - if you are using this to format Visualforce or HTML markup, you’ll need to HTML encode the markup first, or it will cause problems when the HTML is processed by the rich text editor.  I use the HTMLEncoder from opinionatedgeek.com - simply paste your markup in, click the encode button, copy the encoded output and drop this into the rich text editor using the source button as described above.


Tuesday, 24 September 2013

Highlight Empty Fields

A question that came up this week was how to highlight to a user that fields in a form don't have a value, but without stopping the form submission or annoying them with popups/confirmation dialogs. Essentially flagging up 'nice to have' fields that are empty, but leaving the required fields with the standard Salesforce decoration and the fields that nobody really cares about alone.

When the form is initially rendered, this is easy enough to achieve through conditional styling, but the problem with this is that it can't change the background when the user populates the field - instead, a form postback is required and even if rerendering is used to minimise the page updates, a full round trip every time a field is changed is a pretty hefty tax on the user.

This seemed like a good fit for jQuery, so I fired up the Force.com IDE and created a simple lead entry page that highlights a selection of empty fields:

Screen Shot 2013 09 24 at 19 26 14

In order to easily identify the nice to have fields, I gave them each an id that started with 'flagEmpty':

<apex:inputField id="flagEmptyFName" value="{!Lead.FirstName}" />
<apex:inputField id="flagEmptyEmail" value="{!Lead.Email}" />

Next, I wrote the function to apply the necessary style class.  This takes all or part of an id, finds any elements containing the id and for each match, checks if the field has value.  If it does, the 'fieldpopulated' class is applied, otherwise the 'fieldempty' class is applied.  When the appropriate class is applied, the other class is removed:

function flagEmpty(theId)
{
  $("[id*='" + theId + "']").each(function(index, ele) {
		if($(ele).val().length > 0)
		{
			$(ele).removeClass('fieldempty');
			$(ele).addClass('fieldpopulated');
		}
		else
		{
			$(ele).removeClass('fieldpopulated');
			$(ele).addClass('fieldempty');
		}
	});
}

 When the page is initially loaded, the id fragment 'flagEmpty' is passed to the function, which finds all of the elements I've marked in this fashion and highlights the background:

flagEmpty('flagEmpty');

Finally, an onchange handler is added to each element with an id containing 'flagEmpty'. This handler extracts the id of the element and executes the 'flagEmpty()' method, passing the id as the parameter:

$("[id*='flagEmpty']").change( function(event) {
	flagEmpty($(event.target).attr('id'));
});

The fields marked as 'flagEmpty' are originally rendered with a yellow background:

Screen Shot 2013 09 24 at 19 29 22

but after filling in a field and moving focus, the onchange handler fires and changes the background to white:

Screen Shot 2013 09 24 at 19 31 26

The Visualforce page is available at this gist


Saturday, 11 August 2012

The Importance of Page Messages

This week's blog is inspired by a lengthy thread that I was involved in on the Visualforce Discussion Board.  This concerned an action method tied to an onchange event not being called.  I was able to track down what the problem was thanks to the <apex:pageMessages/> component, which displays all error messages associated with the page.

Here's an example of how this component can help track down problems when rerendering parts of a page.  The following page simply presents a button to invoke an action method that increments the counter:

<apex:page controller="PageMessages">
  <apex:form >
    <apex:pageBlock title="Page Messages Test 1">
      <apex:pageBlockButtons >
         <apex:commandButton value="Click Me" action="{!click}" rerender="counter"/>
      </apex:pageBlockButtons>
      <apex:outputLabel value="Count  = " />
      <apex:outputText value="{!countVal}" id="counter"/>
    </apex:pageBlock>
  </apex:form>
</apex:page>

The controller contrives to produce an error rather than increment the counter:

public with sharing class PageMessages {
 public Integer countVal {get; set;}
 private Boolean fakeError=true;
 
 public PageMessages()
 {
  countVal=1;
 }
 
 public void click()
 {
  if (fakeError)
  {
   ApexPages.addMessage(new ApexPages.Message(ApexPages.Severity.ERROR, 'Fake Error'));
  }
  else
  {
   countVal++;
  }
 }
}

The page when rendered is as follows:


Opening the page in a browser window: and clicking the 'Click Me' button results in no change to the count value, and as the rerender attribute turns the command into an AJAX request, it looks like clicking the button has no effect whatsoever.  In this case I can turn on debug logging and see that an error message is being added to the page:

14:37:19.021 (21244000)|CODE_UNIT_STARTED|[EXTERNAL]|01p80000000cOqp|PageMessages invoke(click)
14:37:19.021 (21302000)|HEAP_ALLOCATE|[EXTERNAL]|Bytes:6
14:37:19.021 (21322000)|HEAP_ALLOCATE|[EXTERNAL]|Bytes:524
14:37:19.021 (21338000)|METHOD_ENTRY|[1]|01p80000000cOqp|PageMessages.PageMessages()
14:37:19.021 (21345000)|STATEMENT_EXECUTE|[1]
14:37:19.021 (21357000)|SYSTEM_MODE_ENTER|false
14:37:19.021 (21370000)|HEAP_ALLOCATE|[EXTERNAL]|Bytes:5
14:37:19.021 (21376000)|STATEMENT_EXECUTE|[1]
14:37:19.021 (21385000)|SYSTEM_MODE_EXIT|false
14:37:19.021 (21394000)|METHOD_EXIT|[1]|PageMessages
14:37:19.021 (21443000)|SYSTEM_MODE_ENTER|false
14:37:19.021 (21450000)|HEAP_ALLOCATE|[12]|Bytes:5
14:37:19.021 (21456000)|STATEMENT_EXECUTE|[11]
14:37:19.021 (21465000)|STATEMENT_EXECUTE|[13]
14:37:19.021 (21469000)|STATEMENT_EXECUTE|[14]
14:37:19.021 (21612000)|HEAP_ALLOCATE|[14]|Bytes:10
14:37:19.021 (21689000)|SYSTEM_METHOD_ENTRY|[14]|ApexPages.addMessage(ApexPages.Message)
14:37:19.021 (21697000)|ENTERING_MANAGED_PKG|
14:37:19.021 (21728000)|VF_PAGE_MESSAGE|Fake Error
14:37:19.021 (21738000)|SYSTEM_METHOD_EXIT|[14]|ApexPages.addMessage(ApexPages.Message)
14:37:19.021 (21746000)|SYSTEM_MODE_EXIT|false
14:37:19.021 (21775000)|CODE_UNIT_FINISHED|PageMessages invoke(click)

Its a lot easier just to add an <apex:pagemessages/> component to the page and rerender that as well:

<apex:page controller="PageMessages">
  <apex:pageMessages id="msgs"/>
  <apex:form >
    <apex:pageBlock title="Page Messages Test 1">
      <apex:pageBlockButtons >
         <apex:commandButton value="Click Me" action="{!click}" rerender="counter,msgs"/>
      </apex:pageBlockButtons>
      <apex:outputLabel value="Count  = " />
      <apex:outputText value="{!countVal}" id="counter"/>
    </apex:pageBlock>
  </apex:form>
</apex:page>

which displays the error upon clicking the button:


Another scenario where its pretty much impossible to locate the problem without an  <apex:pageMessages/> component is where there is a required field on the page:

<apex:page controller="PageMessages">
  <apex:pageMessages id="msgs"/>
  <apex:form >
    <apex:pageBlock title="Page Messages Test 1">
      <apex:pageBlockButtons >
         <apex:commandButton value="Click Me" action="{!click}" rerender="counter,msgs"/>
      </apex:pageBlockButtons>
      <apex:outputLabel value="Text1 = " />
      <apex:inputText value="{!text}" required="true"/>
      <br/>
      <apex:outputLabel value="Count = " />
      <apex:outputText value="{!countVal}" id="counter"/>
    </apex:pageBlock>
  </apex:form>
</apex:page>

This time the controller doesn't fake an error, the counter value is simply updated:

public with sharing class PageMessages {
 public Integer countVal {get; set;}
 public String text {get; set;}
 
 public PageMessages()
 {
  countVal=1;
 }
 
 public void click()
 {
  countVal++;
 }
}

As the required component isn't an <apex:inputField/>, there is no decoration of the element to indicate that it is required.  Clicking the 'Click Me' button once again appears to do nothing.


Checking the log this time reveals nothing that can help.  The click method simply isn't being called:

25.0 APEX_CODE,FINEST;APEX_PROFILING,INFO;CALLOUT,INFO;DB,INFO;SYSTEM,DEBUG;VALIDATION,INFO;VISUALFORCE,INFO;WORKFLOW,INFO
15:06:55.036 (36399000)|EXECUTION_STARTED
15:06:55.036 (36462000)|CODE_UNIT_STARTED|[EXTERNAL]|06680000000Tmbw|VF: /apex/kab_tutorial__PageMessage1
15:06:55.046 (46438000)|CODE_UNIT_STARTED|[EXTERNAL]|01p80000000cOqp|PageMessages <init>
15:06:55.046 (46470000)|SYSTEM_MODE_ENTER|true
15:06:55.047 (47466000)|HEAP_ALLOCATE|[EXTERNAL]|Bytes:8
15:06:55.047 (47490000)|HEAP_ALLOCATE|[EXTERNAL]|Bytes:552
15:06:55.047 (47513000)|METHOD_ENTRY|[1]|01p80000000cOqp|PageMessages.PageMessages()
15:06:55.047 (47539000)|STATEMENT_EXECUTE|[1]
15:06:55.047 (47659000)|SYSTEM_MODE_ENTER|false
15:06:55.047 (47678000)|HEAP_ALLOCATE|[EXTERNAL]|Bytes:5
15:06:55.047 (47694000)|STATEMENT_EXECUTE|[1]
15:06:55.047 (47707000)|SYSTEM_MODE_EXIT|false
15:06:55.047 (47720000)|METHOD_EXIT|[1]|PageMessages
15:06:55.047 (47763000)|VARIABLE_SCOPE_BEGIN|[5]|this|KAB_TUTORIAL.PageMessages|true|false
15:06:55.047 (47808000)|HEAP_ALLOCATE|[EXTERNAL]|Bytes:12
15:06:55.047 (47845000)|HEAP_ALLOCATE|[EXTERNAL]|Bytes:12
15:06:55.047 (47889000)|VARIABLE_ASSIGNMENT|[5]|this|{}|0x549e58c6
15:06:55.047 (47910000)|SYSTEM_MODE_ENTER|false
15:06:55.047 (47921000)|HEAP_ALLOCATE|[2]|Bytes:5
15:06:55.047 (47935000)|STATEMENT_EXECUTE|[1]
15:06:55.047 (47944000)|HEAP_ALLOCATE|[2]|Bytes:5
15:06:55.047 (47956000)|STATEMENT_EXECUTE|[2]
15:06:55.047 (47974000)|STATEMENT_EXECUTE|[3]
15:06:55.047 (47991000)|STATEMENT_EXECUTE|[6]
15:06:55.048 (48000000)|STATEMENT_EXECUTE|[7]
15:06:55.048 (48042000)|METHOD_ENTRY|[7]|01p80000000cOqp|KAB_TUTORIAL.PageMessages.__sfdc_countVal(Integer)
15:06:55.048 (48098000)|HEAP_ALLOCATE|[2]|Bytes:12
15:06:55.048 (48122000)|HEAP_ALLOCATE|[2]|Bytes:12
15:06:55.048 (48142000)|VARIABLE_ASSIGNMENT|[-1]|this|{}|0x549e58c6
15:06:55.048 (48155000)|HEAP_ALLOCATE|[2]|Bytes:8
15:06:55.048 (48190000)|VARIABLE_ASSIGNMENT|[-1]|value|1
15:06:55.048 (48205000)|HEAP_ALLOCATE|[2]|Bytes:8
15:06:55.048 (48231000)|VARIABLE_ASSIGNMENT|[2]|this.countVal|1|0x549e58c6
15:06:55.048 (48260000)|METHOD_EXIT|[7]|01p80000000cOqp|KAB_TUTORIAL.PageMessages.__sfdc_countVal(Integer)
15:06:55.048 (48275000)|SYSTEM_MODE_EXIT|false
15:06:55.048 (48292000)|CODE_UNIT_FINISHED|PageMessages <init>
15:06:55.048 (48814000)|VF_SERIALIZE_VIEWSTATE_BEGIN|06680000000Tmbw
15:06:55.050 (50548000)|VF_SERIALIZE_VIEWSTATE_END
15:06:55.440 (54027000)|CUMULATIVE_LIMIT_USAGE
15:06:55.440|LIMIT_USAGE_FOR_NS|KAB_TUTORIAL|
  Number of SOQL queries: 0 out of 100
  Number of query rows: 0 out of 50000
  Number of SOSL queries: 0 out of 20
  Number of DML statements: 0 out of 150
  Number of DML rows: 0 out of 10000
  Number of script statements: 3 out of 200000
  Maximum heap size: 0 out of 6000000
  Number of callouts: 0 out of 10
  Number of Email Invocations: 0 out of 10
  Number of fields describes: 0 out of 100
  Number of record type describes: 0 out of 100
  Number of child relationships describes: 0 out of 100
  Number of picklist describes: 0 out of 100
  Number of future calls: 0 out of 10

15:06:55.440|CUMULATIVE_LIMIT_USAGE_END

15:06:55.054 (54063000)|CODE_UNIT_FINISHED|VF: /apex/kab_tutorial__PageMessage1
15:06:55.054 (54077000)|EXECUTION_FINISHED

In fact what has happened is the client side validation has failed and the page is simply redrawn. However, at this point its very easy to start doubting your code and rewriting it randomly - especially if its more complex than my simple example.  Simply adding an <apex:pageMessages/> component that is rerendered avoids all this:

<apex:page controller="PageMessages">
  <apex:pageMessages id="msgs"/>
  <apex:form >
    <apex:pageBlock title="Page Messages Test 1">
      <apex:pageBlockButtons >
         <apex:commandButton value="Click Me" action="{!click}" rerender="counter,msgs"/>
      </apex:pageBlockButtons>
      <apex:outputLabel value="Text1 = " />
      <apex:inputText value="{!text}" required="true"/>
      <br/>
      <apex:outputLabel value="Count = " />
      <apex:outputText value="{!countVal}" id="counter"/>
    </apex:pageBlock>
  </apex:form>
</apex:page>

Clicking the button this time shows the validation error.


As an aside,  due to the required element not being an <apex:inputField/>, the error message is not particularly helpful.  For details on how to improve this, take a look at one of my older posts.


Wednesday, 2 May 2012

Opportunity Status Chart

An important aspect when working on Opportunities (or anything with a process that a record progresses through) is to knowing how far through the Sales Process a particular Opportunity is.  While some users may be familiar enough with the Sales Process to be able to figure this out immediately from the Stage Name, a visual indicator always helps.

Something I've been working on for a while now is using a line chart for just this purpose.  The key elements of this are:


  • List all of the Stages for the Opportunity - if record types are in use, this should be the Stages applicable to that record type
  • Plot a green line and markers for Stages that have been completed (or skipped, if the Opportunity has jumped into the process at an advanced staged
  • Plot a red line and markers for Stages still to come

The first point had always been a sticking point, but I managed to solve this using back in January by allowing Visualforce to render the specific picklist for the record, and then sending this back to the controller prior to processing the record, as detailed in this post.

It will come as no surprise to regular readers of this blog that I chose to handle the second and third points using the Dojo Charting framework.  I've finally completed the charting code  - below is a screenshot showing the chart embedded into the standard Opportunity record view page:


The controller simply walks the Stage Names and adds them to a complete list until it encounters the current state.   All Stage Names after this go into a todo list - note that both Closed-Won and Closed-Lost appear, and also the default '-- None-- entry - probably not what is desired and left as an exercise for the avid student.  The page is as follows:

<apex:page standardController="Opportunity" extensions="OpportunityStatusChartController" showheader="false" standardstylesheets="false" sidebar="false">
<head>
  <script type="text/javascript" src="https://ajax.googleapis.com/ajax/libs/dojo/1.5/dojo/dojo.xd.js"
        djConfig="parseOnLoad: true,
      modulePaths: { 
          'dojo': 'https://ajax.googleapis.com/ajax/libs/dojo/1.5/dojo', 
          'dijit': 'https://ajax.googleapis.com/ajax/libs/dojo/1.5/dijit', 
         'dojox': 'https://ajax.googleapis.com/ajax/libs/dojo/1.5/dojox' 
             }
    ">
  </script>
  <link rel="stylesheet"
    href="https://ajax.googleapis.com/ajax/libs/dojo/1.5/dijit/themes/claro/claro.css" />
</head>
<body class="claro">
  <apex:form id="frm">
    <apex:actionFunction name="reloadWithStages" action="{!reload}" />
    <div id="test1" style="width: 100%; height: 150px;"></div>
    <apex:outputPanel layout="block" id="vals" style="display:none">
      <apex:inputField value="{!Opportunity.StageName}" required="false" id="stages"/>
      <apex:inputText value="{!valsText}" required="false" id="back"/>
    </apex:outputPanel>
  </apex:form>
  <apex:outputField value="{!Opportunity.StageName}" rendered="false"/>

  <script>
  function reload()
  {
     var ele=document.getElementById('{!$Component.frm.stages}');
     var idx=0;
     var valText='';
     for (idx=0; idx<ele.length; idx++)
     {
        valText+=ele.options[idx].text + ':';
     }
   
     var backele=document.getElementById('{!$Component.frm.back}');
     backele.value=valText;
   
     reloadWithStages();
  }

  <apex:outputPanel layout="none" rendered="{!NOT(loadOnce)}">
    dojo.require("dojox.charting.Chart2D");
    dojo.require("dojox.charting.axis2d.Default");  
    dojo.require("dojox.charting.plot2d.Default");
    dojo.require("dojox.charting.plot2d.StackedLines");
    dojo.require("dojox.charting.plot2d.Columns");
    dojo.require("dojox.charting.plot2d.Bars");
    dojo.require("dojox.charting.plot2d.ClusteredBars");
    dojo.require("dojox.charting.plot2d.StackedBars");
    dojo.require("dojox.charting.plot2d.Bubble");
    dojo.require("dojox.charting.plot2d.Grid");
    dojo.require("dojox.charting.plot2d.Pie");

    dojo.require("dojox.charting.themes.PlotKit.green");

    dojo.require("dojox.charting.action2d.Highlight");
    dojo.require("dojox.charting.action2d.Magnify");
    dojo.require("dojox.charting.action2d.MoveSlice");
    dojo.require("dojox.charting.action2d.Shake");
    dojo.require("dojox.charting.action2d.Tooltip");

    dojo.require("dojox.charting.widget.Legend");

    dojo.require("dojo.colors");
    dojo.require("dojo.fx.easing");
    dojo.require("dojo.date.stamp");
    dojo.require("dojo.date.locale");

    makeCharts = function(){

 var myMap={
  <apex:repeat value="{!labels}" var="label">
      '{!label.idx}':'{!label.text}'<apex:outputText value="," rendered="{!label.idx!=labelCount}"/>
  </apex:repeat>
            };
            
 var chart1 = new dojox.charting.Chart2D("test1");
 chart1.setTheme(dojox.charting.themes.PlotKit.green);
 chart1.addPlot("default", {type: "Default", lines: true, markers: true, tension:2});
 chart1.addAxis("x",
 { 
    majorTick: {stroke: "black", length: 3},
    majorTickStep:1, 
  minorTicks: false, 
  microTicks: false,
  min: 0,
  max: {!labelCount},
  rotation:30, 
  font: "6pt Tahoma",
  labels: [
  <apex:repeat value="{!labels}" var="label">
      {value: {!label.idx}, text:'{!label.text}'}<apex:outputText value="," rendered="{!label.idx!=labelCount}"/>
  </apex:repeat>
  ]
  
 });
 
 chart1.addSeries("cleared", 
   [
       <apex:repeat value="{!doneStageNumbers}" var="stage">
    {x: {!stage}, y: 2},
    </apex:repeat>
   ]);
 chart1.addSeries("todo", 
   [
       <apex:repeat value="{!todoStageNumbers}" var="stage">
    {x: {!stage}, y: 2},
    </apex:repeat>
   ],
   {plot: "default", stroke: {color:"#FE2E2E"}}
   );
   
 var myMap={
  <apex:repeat value="{!tooltips}" var="tooltip">
   "{!tooltip.idx}": "{!tooltip.text}",
  </apex:repeat>
            };
            
 var anim1a = new dojox.charting.action2d.Magnify(chart1, "default");
 var anim1b = new dojox.charting.action2d.Tooltip(chart1, "default",
 {
     text : function(o) {
         return (myMap[o.x])
                       }
        });
   
 chart1.render();
    };
  </apex:outputPanel>
   dojo.addOnLoad(
     <apex:outputPanel layout="none" rendered="{!loadOnce}">
        reload
     </apex:outputPanel>
     <apex:outputPanel layout="none" rendered="{!NOT(loadOnce)}">
 makeCharts
     </apex:outputPanel>
      );
  </script>
</body>
</apex:page>

Essentially this page has two distinct functions - the first to render a hidden form containing an input field for the StageName field, and then submit the values back via javascript, while the second is to actually render the chart based on the values.  The completed stages are plotted as a separate series to those that remain, to allow that part of the chart to be rendered in a different colour and markers. I've also thrown in a tooltip on each of my markers so that I can display some help/explanation text about each of the stages.

The controller is quite a simple one:
public class OpportunityStatusChartController
{
 public List<Tuple> labels {get; set;}
 public List<Tuple> tooltips {get; set;}
 public List<Integer> doneStageNumbers {get; set;}
 public List<Integer> todoStageNumbers {get; set;}
 public Integer labelCount {get; set;}
 public Boolean loadOnce {get; set;}
 public String valsText {get; set;}
        private Opportunity opp;
 
 public OpportunityStatusChartController(ApexPages.StandardController std)
 {
  opp=(Opportunity) std.getRecord();
  loadOnce=true;
 }
 
 public PageReference reload()
 {
  init();
  loadOnce=false;
  
  return null;
 }
 
 
 public void init()
 {
  labels=new List<Tuple>();
  tooltips=new List<Tuple>();
  doneStageNumbers=new List<Integer>();
  todoStageNumbers=new List<Integer>();
  
  labelCount=0;
  Boolean done=false;
  labels.add(new Tuple(labelCount++, '.'));
  
  for (String val : valsText.split(':'))
  {
   if (!done)
   {
    doneStageNumbers.add(labelCount);
   }
   else
   {
    todoStageNumbers.add(labelCount);
   }
    
   if (val==opp.StageName)
   {
    done=true;
    todoStageNumbers.add(labelCount);
   }
   labels.add(new Tuple(labelCount, val));
   toolTips.add(new Tuple(labelCount, 'Help for ' + val + ' stage'));
   labelCount++;
  }  
  labels.add(new Tuple(labelCount, '.'));
 }
 
 public class Tuple 
 {
  public Integer idx {get; set;}
  public String text {get; set;}
  
  public Tuple(Integer inIdx, String inText)
  {
   idx=inIdx;
   text=inText;
  }
 }
}

The labels are returned in a containing Tuple class along with an index, which is the x-axis position of the ploy.  Everything is plotted at the same level on the y-axis, as I want a straight line chart.

I can then change the record type of the Opportunity, save it and the chart updates accordingly:


You can see a live example of this on my demo site - simply click on one of the Opportunities to see the progress chart.