Showing posts with label plug-in. Show all posts

Sunday, 6 August 2023

Salesforce CLI Open AI Plug-in - Function Calling

Image generated by Stable Diffusion online, based on a prompt by Bob Buzzard

WARNING: The new command covered in this blog extracts information from your Salesforce database and sends it to OpenAI in the US to provide additional grounding to a prompt - only use this with test/fake data, as there is no attempt at masking or restricting field access.

Introduction

Back in June 2023, only a couple of months ago on the calendar but a lifetime in generative AI product releases, OpenAI announced the availability of function calling. Now that my plug-in is integrated with gpt-3.5+, this is now something I can use, but what value does it add? 

The short version - this allows the model to progress past it's training data and request more information to satisfy a prompt. 

The longer version. As we all know, the data used to train gpt-3.5 cut off at September 2021, so often the response to a prompt will warn you that things may have changed. With function calling, when you prompt the model you also tell it about any functions that you have available that it can use to retrieve additional information. If the functions don't help it will return the response as usual, but if they would it will return function calls for you to make and pass back to it. Note that the model doesn't call the functions, it tells you which functions to call and the parameters to pass and expects you to make the decision as to whether you should call them, which is as it should be.

The Plug-in Command

In the latest version (1.2.2) of my plug-in, there's a new command that gives the model access to a function to pull data from Salesforce if needed. The function simply takes a query and returns the result as a JSON formatted string:

const queryData = async (query: string): Promise<string> => {
  const authInfo = await AuthInfo.create({ username: flags.username });
  const connection = await Connection.create({ authInfo });
  const result = await connection.query<{ Name: string; Id: string }>(query);

  return JSON.stringify(result);
}

When the command is executed, the request to the Chat Completion API includes the prompt supplied by the user, and details of the function:

const functions: ChatCompletionFunctions[] = [
  {
    name: 'queryData',
    description: 'A function to extract records from Salesforce via a SOQL query',
    parameters: {
      type: 'object',
      properties: {
        query: {
          type: 'string',
          description: 'The SOQL query to execute',
        },
      },
      required: ['query'],
    }
  }
];

Note that my function isn't targeting any specific objects, nor does it have any logic to figure out what might be needed based on the user's prompt - it simply executes a query and returns the results, which might be an error or an empty data set.

I execute this command as follows:

> sf bbai org data -t "Create an email introducing GenePoint, a new account we are tracking in Salesforce. Include the industry and number of employee details from our Salesforce database" -u keir.bowden@googlemail.com

Note that I have to tell the prompt that the GenePoint account details can be found in our Salesforce database - if I don't do that it won't see any value in the function. I've also provided the description of a couple of fields that I want it to extract, and finally I've supplied the username that I'll connect to Salesforce with if the model asks me to run a query.

When the model responds, it will indicate if it wants me to execute the function by specifying the finish_reason as 'function_call', and adding the details in the function_call property of the message:

{
  index: 0,
  message: {
    role: 'assistant',
    content: null,
    function_call: {
      name: 'queryData',
      arguments: '{\n' +
        `  "query": "SELECT Industry, NumberOfEmployees FROM Account 
                     WHERE Name = 'GenePoint' LIMIT 1"\n`
                  }'
    }
  },
  finish_reason: 'function_call'
}

In this case it wants me to call queryData with a query parameter of a SOQL query string that extracts details of the GenePoint account. I execute this, then add the results of the query to the prompt message and retry my request. This time I get a response with the email containing the details I wanted:

Subject: Introducing GenePoint - A Promising Addition to Our Portfolio

Dear Team,

I hope this email finds you well. I am excited to introduce you to our newest account, GenePoint, which we have recently started tracking in our Salesforce database. GenePoint is a biotechnology company that shows immense potential in its field. Allow me to provide you with some important details about this account.

Industry: Biotechnology

Number of Employees: 265

Conclusion

I think this is very cool because I haven't had to inspect the prompt in any way to decide to extract information from Salesforce. The model has been given a very basic function and knows (with some nudging, for sure) when it is appropriate to call it and, more importantly, the query that needs to be run to extract the details the user requested. 

Right now I've only told it about a single function, so it's either going to call that or nothing, but I can easily imagine a collection of functions that provide access to many internal systems. This allows the final request to be grounded with a huge amount of relevant data, leading to a highly accurate and targeted response.

Once again a reminder that this could result in sensitive or personally identifiable information being sent to the OpenAI API in the US to be processed, so while it's fun to try out you really don't want to go any where near your production data with this.

More Information


Sunday, 30 July 2023

Salesforce CLI Open AI Plug-in - Generating Records


Image generated by Stable Diffusion 2.1, based on a prompt from Bob Buzzard

Introduction

After the go-live of Service and Sales GPT, I felt that I had to revisit my Salesforce CLI Open AI Plug-in and connect it up to the GPT 4 Large Language Model. I didn't succeed in this quest, as while I am a paying customer of OpenAI, I haven't satisfied the requirement of making a successful payment of at least $1. The API function I'm hitting, Create Chat Completion, supports gpt-3.5-turbo and the gpt-4 variants, so once I've racked up enough cost using the earlier models I can switch over by changing one parameter. My current spending looks like it will take me a few months to get there, but such is life with competitively priced APIs.

The Use Case

The first incarnation of the plug-in asks the model to describe Apex, CLI or Salesforce concepts, but I wanted something that was more of a tool than a content generator, so I decided on creating test records. The new command takes parameters listing the field names, the desired output format, and the number of records required, and folds these into the messages passed to the API function. Like the Completion API, the interface is very simple:

const response = await openai.createChatCompletion({
     model: 'gpt-3.5-turbo',
     messages,
     temperature: 1,
     max_tokens: maxTokens,
     top_p: 1,
     frequency_penalty: 0,
     presence_penalty: 0,
   });

result = (response.data.choices[0].message?.content as string);

There's a few more parameters than the Completion API:

  • model - the Large Language Model that I send the request to. Right now I've hardcoded this to the latest I can access
  • messages - the collection of messages to send. The messages build on each other, and each message has a content (the instruction/request) and a role (where the instruction is being sent). This allows me to separate the instructions to the model (when the role is assistant, I'm giving it constraints about how to behave) from the request (when the role is user, this is the task/request I'm asking it to carry out).
  • max_tokens is the maximum number of tokens (approximately 4 characters of text) that my request combined with the response can be. I've set this to 3,500, which is approaching the limit of the gpt-3.5 model. If you have a lot of fields you'll have to generate a smaller number of records to avoid breaching this. I was able to create 50 records with 4-5 fields inside this limit, but your mileage may vary.
  • temperature and top_p guide the model as to whether I want precise or creative responses.
  • frequency_penalty and presence_penalty indicate whether I want the model to continually focus on tokens if they are repeated, or focus on new information.

As this is an asynchronous API, I await the response, then pick the first element in the choices array. 

Here's a few executions to show it in action - linebreaks have been added to the commands to aid legibility - remove these if you copy/paste the commands.

> sf bbai data testdata -f 'Index (count starting at 1), Name (Text, product name), 
            Amount (Number), CloseDate (Date yyyy-mm-dd), 
            StageName (One of these values : Negotiating, Closed Lost, Closed Won)' 
            -r csv

Here are the records you requested
Index,Name,Amount,CloseDate,StageName
1,Product A,1000,2022-01-15,Closed Lost
2,Product B,2500,2022-02-28,Closed Won
3,Product C,500,2022-03-10,Closed Lost
4,Product D,800,2022-04-05,Closed Won
5,Product E,1500,2022-05-20,Negotiating

> sf bbai data testdata -f 'FirstName (Text), LastName (Text), Company (Text), 
                            Email (Email), Rating__c (1-10)' 
                            -n 4 -r json

Here are the records you requested
[
  {
    "FirstName": "John",
    "LastName": "Doe",
    "Company": "ABC Inc.",
    "Email": "john.doe@example.com",
    "Rating__c": 8
  },
  {
    "FirstName": "Jane",
    "LastName": "Smith",
    "Company": "XYZ Corp.",
    "Email": "jane.smith@example.com",
    "Rating__c": 5
  },
  {
    "FirstName": "Michael",
    "LastName": "Johnson",
    "Company": "123 Co.",
    "Email": "michael.johnson@example.com",
    "Rating__c": 9
  },
  {
    "FirstName": "Sarah",
    "LastName": "Williams",
    "Company": "Acme Ltd.",
    "Email": "sarah.williams@example.com",
    "Rating__c": 7
  }
]

There's a few interesting points to note here:

  • Formatting field data is conversational - e.g. when I use Date yyyy-mm-dd the model knows that I want the date in ISO8601 format. For picklist values, I just tell it 'One of these values' and it does the rest.
  • In the messages I asked it to generate realistic data, and while it's very good at this for First Name, Last Name, Email, Company, it's not when told a Name field should be a product name, just giving me Product A, Product B etc.
  • It sometimes takes it a couple of requests to generate the output in a format suitable for dropping into a file - I'm guessing this is because I instruct the model and make the request in a single API call.
  • I've generated probably close to 500 records while testing this, and that has cost me the princely sum of $0.04. If you want to play around with the GPT models, it really is dirt cheap.
The final point I'll make, as I did in the last post, is how simple the code is. All the effort went into the messages to ask the model to generate the data in the correct format, not to include additional information that it was responding to the request, to generate realistic data. Truly the key programming language for Generative AI is the supported language that you speak - English in my case!

As before, you can install the plug-in via :
> sf plugins install bbai
or if you have already installed it, upgrade via :
> sf plugins update

More Information


Sunday, 16 July 2023

Salesforce CLI OpenAI Plug-in


Image generated using StableDiffusion 2.1 via https://huggingface.co/spaces/stabilityai/stable-diffusion

Introduction

I've finally found time to have a play around with the OpenAI API, and was delighted to find that it has a NodeJS library, so I can interact with it via Typescript or JavaScript rather than learning Python. Not that I have any issue with learning Python, but it's not something that is that useful for my day to day work and thus not something I want to invest effort in right now.

As I've said many times in the past, anyone who knows me knows that I love a Salesforce CLI Plug-in, and that is where my mind immediately went once I'd cloned their Github repo and been through the (very) quick overview. 

The Plug-In

I wasn't really interested in surfacing a chat bot via the Salesforce CLI - for a start, it wouldn't really add anything over and above the public OpenAI chat page

The first area I investigated was asking it to review Apex classes and call out any inefficiencies or divergence from best practice. While this was entertaining, and found some real issues, it was also wildly inaccurate (and probably something my Evil Co-Worker will move forward with to mess with everyone). 

I then built out a couple of commands to generate titles and abstracts for conference sessions based on Salesforce development concepts, but as the Dreamforce call for papers is complete for this year, that didn't seem worth the effort.

I landed on a set of explainer commands that would ask the AI model to explain something to help a more junior developer:

  • apex - explain a topic in the context of the Apex programming language
  • cli - explain a Salesforce CLI command, along with an example
  • salesforce - explain a Salesforce topic using appropriate language for a specific audience - admins, devs, execs etc.
Accessing the OpenAI API is very straightforward:

Install the OpenAI Package

> npm install openai

Create the API instance
    import { Configuration, OpenAIApi } from 'openai';

    const configuration = new Configuration({
        apiKey: process.env.OPENAI_API_KEY,
    });
    const openai = new OpenAIApi(configuration);
Note that the API Key comes from the OPENAI_API_KEY environment variable - if you want to try out the plug-in yourself you'll need an OpenAI account and your own key. 

Create the Completion

This is where the prompt is passed to the model so that it can generate a response:
    const completion = await openai.createCompletion({
        model: 'text-davinci-003',
        max_tokens: maxTokens,
        prompt,
        temperature
      });

      result = (completion.data.choices[0].text as string);
Note that the completions API is legacy and received it's final update in July 2023. I chose this simply because it's cheap. When you are writing a new plug-in connecting to a third party system you get a lot of stuff wrong and I was keen not to rack up too large a bill while I was learning! The Chat Completions API is slightly different, in that it receives a list of messages and can call functions with results. It's not dramatically different though, so I felt anything I learned applied to both.

I moved this into a shared function, hence most of the call is parameterised. The createCompletion function can take many parameters, but here's the explanation of those that I've used:
  • model - the large language model to use
  • max_tokens - the maximum number of tokens to generate the response. A token is typically thought to be around 4 characters, so will sometimes represent words and sometimes parts of words. Input and output token counts are how you get charged for API use, so you want to keep them down where you can. The function defaults to 16 which in practice is fairly useless for a response to a human, so I've typically upped it to 256
  • prompt - the question/task that I've set the model
  • temperature - a value between 0 and 2.0 that indicates how accurate a response I want. I find that 0.6 works pretty well. If you change this, do it in small increments, as I asked it to review an Apex class with a temperature of 1.5 and got pretty much gibberish.
And that's about it. The rest of the code is available at the Github repository - it's mostly standard CLI Plug-In stuff of handling flags and displaying the response.

The Plug-In In Action

Once I've installed the plug-in from NPM, using the following command :

> sf plugins install bbai

I can ask for some explanations. First, explain the Salesforce concept of groups. As I don't provide details of the audience, it defaults to programmers:

> sf bbai explain salesforce -t groups

Here are the results


Groups in Salesforce are a way to organize and manage users in the system. They allow you to categorize users based on their roles and responsibilities, allowing for more streamlined access to information. For example, you can create a group for all the programmers within your organization, allowing them to access the same resources, documents, and tasks. Additionally, groups can be used to assign tasks, send messages, and create reports. By creating groups, you can quickly and easily manage permissions, tasks, and data access for your programming team.


Now the same command for an exec audience - notice the difference?

> sf bbai explain salesforce -t groups -s executive

Here are the results


Groups in Salesforce allow organizations to manage and control access to records and data. Groups are used to assign users to roles within the organization and to grant them access to the appropriate records. By using groups, organizations can easily assign the same set of permissions to multiple users, allowing them to quickly and easily manage access rights. This makes it easier to manage user permissions, and also helps to ensure that users only have access to the data and records they need to do their job. Groups also streamline the process of granting and revoking access rights, making it easier for organizations to stay secure and compliant.


And now I want to start working with some of these concepts, but I don't understand how to get my code into the instance via the CLI:

sf bbai explain cli -c "source push"             

Here are the results


Salesforce CLI command source push is used to deploy source from the local environment (e.g. a developer’s machine) to a Salesforce org. This command is useful in a DevOps process, as it enables developers to quickly and easily deploy their code changes to a Salesforce org for testing and deployment.


Example Execution: 

sfdx force:source:push --targetusername devorg --sourcepath /path/to/source/directory/


The command above will deploy all source code in the specified directory to the org with the username devorg.

Conclusions

Something that really stood out in this was the simplicity of the integration - it's literally a few lines of code. Which is as it should be - with generative AI, English is the programming language so most of the effort should go into the prompt rather than getting set up to send the prompt. Looking ahead a few years, I can see this being a game changer for integrating systems. Rather than starting with a book of API specifications that you need to adhere to, there will be a single entry point where you send conversational requests to a model trained on the specific data. "Return the id and all name and address fields of all the contacts we have that work for financial services customers in JSON format", without needing to develop that specific interface.

The Cost

This was top of mind for me during this experiment. I've seen situations in the past where request based charging really racked up during testing. OpenAI allows you to set a hard and soft limit, so that you can't get into that situation, but it also charges by the token for both input and output. When you aren't that familiar with how many tokens might be in a 2-3 line prompt. After building my plug-in, with the usual number of mistakes, and testing it for several hours, I'd used the princely sum of $0.16. 

While that might sound like there's nothing to worry about, but the latest models are more expensive per token and can handle significantly more tokens both for input and output, so you may find that things stack up quickly. I've seen news stories lauding the ability to send an entire book to a generative AI as context, but no mention of how much you'll be charged to do that!

More Information


Saturday, 17 December 2022

The Org Documentor and the Order of Execution Diagram

Introduction

Earlier this year (2022) Salesforce Architects introduced a diagrammatic representation of the order of execution, which was a game changer in terms of easing understanding. I've had a task on my todo list since then to figure out how I could incorporate it into the Org Documentor, and thanks to using up some annual leave in a freezing December, I've finally had time to work on it.

Click to View

I already have information about the configured automation organised by the order of execution step, but currently in a text format:


so it made sense to try to repurpose this. I really liked the idea of making the diagram clickable, via an image map, but I wasn't overly keen on adding JavaScript to display popups with the details of the configured automation, so I went hunting for a CSS/HTML only solution. 

I found it at Mate Marschalko's Medium post, which showed how to use the :target pseudo-class to show or hide overlay divs without a single line of JavaScript, so set about applying this technique to the Org Documentor via a new EJS template, heavily based on my existing order of execution template. I also needed to generate the image map element based on selected areas of the Salesforce diagram, for which I used <img-map> - I did find that it all went awry after I selected 4-5 areas, so I did them one at a time and copied the coordinates over to my new template. 

After a few hours work I had a reference to the Salesforce diagram in the generated documentation for each object, via the new Image Detail column:


but with elements that could be clicked on:


which would display the automation configured for the object for that specific step and a description if the user cared to read more.


Albeit with a couple of caveats:
  • Because the red line around the clickable element is applied to an <area> element, these only display when the element is clicked. This means that to find what is clickable you need to mouse around looking for the change in the pointer (or look at the text version of the order of execution for the object and identify what is supported there)

  • The page jumps around a bit under you. This is due to the nature of the :target psueudo class - when you click on an element, the URL is updated with a fragment identifying the popup required, which transforms from zero size to it's configured size in the centre of the page. This causes the browser to scroll down to show it correctly. When you close the popup, the URL is changed to remove the fragment, which makes the browser jump to the top of the page. This could be obviated by using a smaller image, but my view is it's better to live with this and have an image that you can read.

Try it Yourself


Version 4.1. 0 of the plugin includes this functionality and is available from NPM.

The sample output has been regenerated on Render,com, so if you access:


and click element 3 - Executes "Before Save" record triggered flows, you can see it in action.

Related Posts


Sunday, 4 December 2022

The Latest from the Org Documentor

Migrated Sample Output

November 28th 2022 marked a sad day in the Salesforce ecosystem, as Heroku free plans ended. From the learning perspective it's a real shame, as I'd used the free plans many times in the past to learn more about Node and other web technologies. From the live apps perspective it wasn't a huge impact, as the only work that I wanted to keep was a few static sties. Now we are into December it's happened, so time to find another home for my sites.

I ended up going for render, as it has a well regarded free tier and was very straightforward to set up. Going forward you'll find the sample output at:

    https://bbdoc-sample-output.onrender.com/

I've updated some of the references in this blog and elsewhere, but I'm sure I'll have missed some, so if you come across a broken Heroku link then let me know and I'll fix it up.

Version 4.0.6

There's also a new version of the documentor plug-in available from NPM - this is a community contribution from Carl Vescovi that fixes a couple of bugs in the flow handling and adds the flow type to the output. 

The Documentation Site

In case you haven't come across it before, the Documentor is documented (meta eh?) at:

     https://orgdoc.bobbuzzard.org/home

This has details of how to setup and configure the Documentor, as well as release information.

Related Posts


Saturday, 26 June 2021

Extracting Limits Information from Test Debug Logs

(The follow up to No Limits by 2Unlimited)

Introduction

In large enterprise Salesforce implementations there's often a particular piece of functionality that is limit-poor - it consumes most of one or more limits as a matter of course.  It might have to retrieve information from myriad standard and custom objects, update a whole load of other objects and do a bunch of processing in between that consumes a lot of CPU time, and when it is invoked with a large number of records it flies close to the maximum values like Icarus flying too close to the sun. Often these areas will have unit tests so that unlike Icarus they don't fall into the sea and drown if the code is changed to add a few more SOQL queries.

Often these tests will try to ensure the published maximum number of records can still be handled, but the problem there is that by the time the test fails you have nowhere to go. Another approach is to determine how much of each limit is currently consumed and fail the test if it goes over, which leads to brittle tests that fail for minor changes or, in the case of CPU time, flappy tests that sometimes pass and sometimes fail  even though the code hasn't changed, depending on what else is happening on the Salesforce instance. 

Ideally there would be some way to figure out when the consumed limits change, but without the nuclear option of failing the unit test. In Apex everything that tests do is rolled back when the test completes, regardless of success or failure, sending notifications isn't an option, nor is saving the limit information to an object. This is something I've been wrestling with for years and haven't been able to come up with a solution for. Until now. And in a turn of events that will surprise nobody, it involves a Salesforce CLI plug-in.

The Plug-in

The limitlog plug-in executes the unit test supplied by the user, then relies on the fact that unit tests always generate a debug log - from the Salesforce help on Debug Logs Order of Precedence :

If you don’t have active trace flags, synchronous and asynchronous Apex tests execute with the default logging levels.

The most recent log for the user is then retrieved, and the limits information parsed from it. There's a bit of a wrinkle around this if your org has a namespace, so the plug-in allows you to specify one if you need something other than the default.

The limits information is then returned in JSON format or written to a Salesforce custom object - you can find the metadata for this at the limitlogsalesforce Github repository. 

The metadata also includes a flow that checks the limit information from the previous run for the unit test and sends me an email if anything is different:

So now I can add the plug-in to my continuous integration operations and get notified if the limits consumption has gone up, without having to force unit test failures. 

Installing and Executing

If you want to capture the limit information in Salesforce, the first thing to do is spin up a scratch org or developer edition, clone the limitlogsalesforce Github repository and push/deploy to this org. Make sure to authenticate against it via the CLI.

Next, identify or create a unit test that has some limit impact - this can be in the same developer/scratch org or a different one.

The install the plug-in into your CLI :

    sfdx plugins:install limitlog

Then execute the test command from the plug-in as follows:

sfdx bblimlog:test -n LimitLogSample -r KABDEV -t LimitLogSampleTest.DoWorkTest -s KAB_TUTORIAL -u LIMITLOG -w

where:

  • -n LimitLogSample is the unique name for this test - the flow uses this to find the previous record and figure out if anything has changed.
  • -r KABDEV is the username to run the tests as. If your tests are in the same org as you are writing the data, you can omit this.
  • -t LimitLogSampleTest.DoWorkTest is the unit test method to run
  • -s KAB_TUTORIAL is the namespace of my dev org - if you don't have a namespace, omit this to pick up the default
  • -u LIMITLOG is the username for the org where the test information will be written to
  • -w says to write the limits objects to Salesforce. If you don't supply this, make sure to add the --json switch to see the output.

You will then see output similar to the following:

Executing test LimitLogSampleTest.DoWorkTest
Retrieving test log file
Extracting limits information
Writing limits information to Salesforce
Limits information written to Salesforce

and the limits record will be available in the Salesforce UI:


and here's the list of records in my org that caused the notifications to be sent when the limits increased:


In future blogs I'll go through how this works under the hood, but this feels like enough for now. As this is the first version of the plug-in I'm sure there will be some scenarios it doesn't handle - if you come across one of these, please raise an issue in the plug-in source repo and I'll see what I can do.

Saturday, 27 March 2021

Org Documentor - Field Count Badges


Introduction


With large, mature implementations, it's sometimes difficult to keep track of how close you are getting to the field limits - for example, the total number of fields on an object, which varies from instance to instance, or the total number of relationship fields, which is 40 unless Salesforce are willing to raise it for you. This is compounded when you have multiple development streams working in parallel, as the total number of relationship fields in only known when the various branches are merged ready for cutting a release branch. 

As Peter Drucker said, if you can't measure it you can't improve it, so the Org Documentor is getting into the measurement business.


Field Count Badges


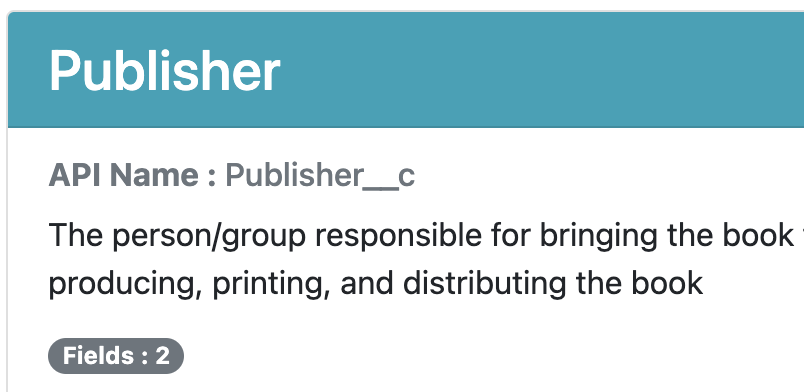
The latest release (3.6.0) of the Org Documentor aims to help with this, by adding Bootstrap badges containing field counts to the object documentation. Right now it's the total number of fields on the object and the total number of relationship fields, as the screen grab below from the sample metadata output shows:


If there are no relationship fields, the badge isn't rendered:


Right now the badges don't change colour to flag up that the count is close to the limit, as there's no way to know if that is the case, as the Documentor is designed to work against object metadata and doesn't have access to any orgs that the metadata is installed into. Flagging the total number of fields as close to the Enterprise Edition limit isn't helpful if it will only be installed into Unlimited Edition, and vice versa is even worse.  It's also possible that there are other fields on the object that aren't version controlled - added by a managed package for example.

So I decided to leave it as the standard Bootstrap secondary badge colour, which will remain the case unless I get feedback from users that they'd like something else. I'm also open to suggestions for additional badges - if you have any strong feelings on either of these topics, please create an issue at the plug-in Github repo.

As always, you can view the latest output for the sample metadata on the public site.


Updated Plug-in


Version 3.6.0 of the plug-in has this new functionality and can be found on NPM

If you already have the plug-in installed, just run sfdx plugins:update to upgrade to 3.6.0 - run sfdx plugins once you have done that to check the version.

The source code for the plug-in can be found in the Github repository.

Related Posts


Thursday, 18 March 2021

The Documentor Documented (and Moar Detail)


This week I closed a couple of issues on the Org Documentor, and added some more flexibility around the output.

Moar Detail


The first issue was a request from Andy Ognenoff for some additional fields - relatively straightforward as three came straight from the CustomField metadata and one combined a couple of fields if the first was true. 

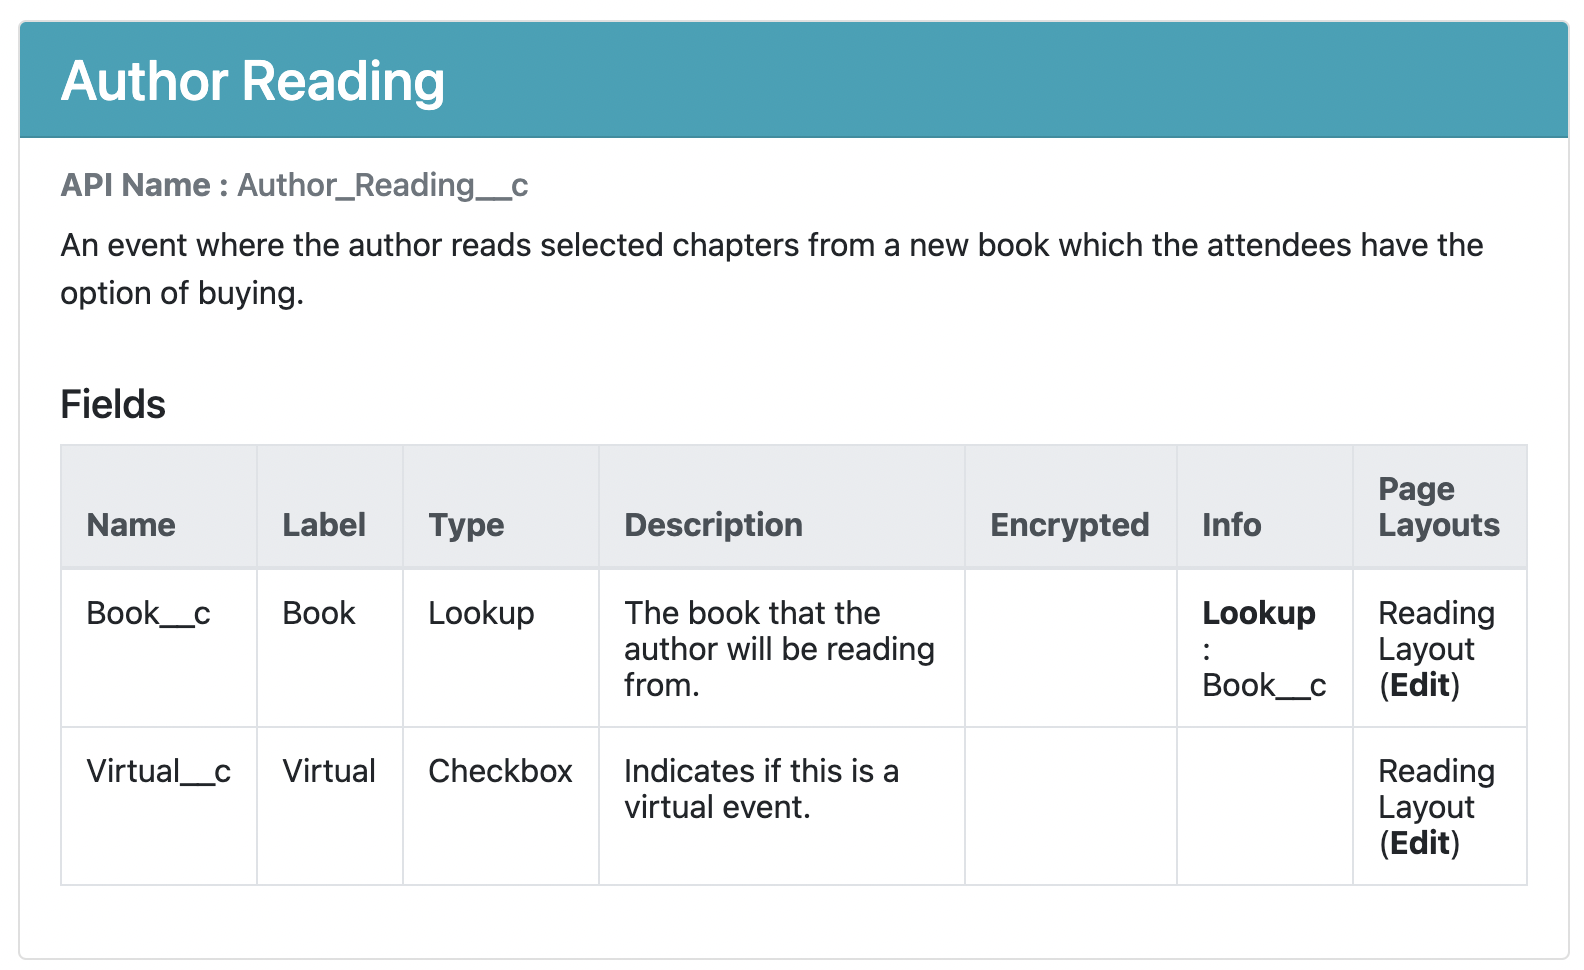
This gave rise to the need for a little more flexibility, as the pages started to get pretty wide with the number of columns and the length of the detail rendered. So the latest version of the plug-in allows you to configure the columns that will be displayed - at the group level, for all objects, or you can leave configuration alone and pick up the default of all columns.

Here's the configuration from my sample metadata repo:
"groups": {
    "events": {
        "name":"events", 
        "columns":["Name", "Label", "Type", "Description", "Info", "Page Layouts", "Encrypted"],
        "description": "Objects associated with events",
        "objects": "Book_Signing__c, Author_Reading__c"
    },
    "other": {
       "name":"other", 
       "columns":["Name", "Label", "Type", "Description", "Info", "Page Layouts", "Security", "Compliance", "In Use", "Encrypted"],
       "title":"Uncategorised Objects",
       "description": "Objects that do not fall into any other category"
    }
}
and the associated output, first for events, which just adds the Encrypted field (which is empty as I don't have Shield enabled!):


and then a new Email_Address__c field on the Author__c custom object, which includes compliance fields:


As always, you can view the output for the sample metadata on the public site.

The Documentor, Documented


The other issue that I finally got around to was documenting the configuration file. I used a Google Site for this, as I find them extremely easy to spin up and fill in. You don't get the same level of control that you would over something like Github pages, but if you want something out there quickly then they are hard to beat. There's not too much in there right now, mostly around setup and configuration, but more will come. If there's something that you particularly want to see, then create an issue in the Github repo and I'll see what I can do.

Updated Plug-in


Version 3.5.1 of the plug-in has this new functionality and can be found on NPM

If you already have the plug-in installed, just run sfdx plugins:update to upgrade to 3.5.1 - run sfdx plugins once you have done that to check the version.

The source code for the plug-in can be found in the Github repository.

Related Posts

Saturday, 6 February 2021

Org Documentor - Flag Non-Display Fields


Introduction

Towards the end of 2020, I pushed an update to the Org Documentor plug-in to include details of the page layouts that a field is referenced in. When I posted this on Linked In, I got the following comment from Anand Narasimhan (a blast from the past from the early days of the CTA program) :


Which chimed with some of the comments I'd received when I was asked to add this, around helping to retire old fields that weren't used any more.  This didn't seem like it would take a huge amount of work to implement, so I added an issue to the Github repository and forgot about it until today.

Solution


It certainly didn't take a huge amount of effort. As detailed when adding the page layout reference information, I build up a map of the page layouts that reference a field keyed by the field name. As I'm building a complex JavaScript object to pass to the EJS templating framework, I add the list of page layouts to a field property named pageLayoutInfo.  It was then simply a matter of setting the background colour for the field if the pageLayoutInfo property was empty. The slight complication was that if the field has been determined to be in an error (missing description) or warning (todo, deprecated in the field description) then it would already have a background colour and I wanted to leave that in place. 

All told, this was 4 lines of code (could be reduced to 3 with a wider screen ;):
  if ( (!field.pageLayoutInfo) && 
       (''==field.background) ) {
     field.background='#f5dfea';  
  } 

I then added a field to the sample metadata that isn't present on any page layouts - Internal Description - and regenerated the report, which highlights the field in pink as expected:


Bonus Changes


In response to an issue raised from the community, I also added the ability to configure the name of the report subdirectory for a metadata type via the reportDirectory property in the configuration file. The sample repository has been updated to write the pages pertaining to the objects metadata to the objs directory. If you don't provide the reportDirectory property, it will default to the metadata type name - e.g. objects, triggers. I've also added an issue to document the configuration file properties, as right now there is an example file and I leave everyone to draw their own conclusions.

I also fixed a bug in the aura enabled pages that detail the Apex controller classes for aura components - if the component extended a super component it all went to hell, but now it handles that correctly.

Updated Plug-in


Version 3.4.6 of the plug-in has this new functionality and can be found on NPM

If you already have the plug-in installed, just run sfdx plugins:update to upgrade to 3.4.6 - run sfdx plugins once you have done that to check the version.

if you aren't already using it, check out the dedicated page to read more about how to install and configure it.

The source code for the plug-in can be found in the Github repository.

Related Posts