Saturday, 4 April 2015

Loading Salesforce Data into Analytics Cloud

Loading Salesforce Data into Analytics Cloud

Introduction

In my earlier post on Analytics Cloud (aka Salesforce Wave) I showed how to load data from a CSV file. Another common use case is to load Salesforce data, such as Cases and Opportunities, for example to see how performance has improved (or otherwise!) over time.

Setting Up

To get started, access the Data Monitor page by clicking the gear icon:

Screen Shot 2015 04 04 at 16 44 04

this takes you to the Dataflow View. The Analytics Cloud provides a Default Salesforce Dataflow that you can download from the drop down on the right hand side of the page:

Screen Shot 2015 04 04 at 16 47 23

This will download a Dataflow Definition file in JSON format. The default data flow is documented in the Analytics Cloud Implementation Guide, so I won’t go into further detail on that here. Instead I’ll walk through a Dataflow Definition that I use to bring the case data from my Salesforce instance. The full JSON file can be downloaded from the Related section below.

Loading Case Data

The following JSON stanza pulls the Case records and creates an interim dataset called “Extract_Cases” - the dataset name is important as will be explained later:

    "Extract_Cases":{
        "action":"sfdcDigest",
        "parameters":{
            "object":"Case",
            "fields":[
                {
                    "name":"CaseNumber"
                },
                {
                    "name":"ContactId"
                },
                {
                    "name":"AccountId"
                },
                {
                    "name":"Type"
                },
                {
                    "name":"Hours_Worked__c"
                },
                {
                    "name":"Subject"
                },
                {
                    "name":"Status"
                },
                {
                    "name":"Description"
                },
                {
                    "name":"CreatedDate"
                },
                {
                    "name":"ClosedDate"
                }
            ]
        }
    }

this pulls all of the case data, but the account and contact information is only available as Salesforce IDs, which isn’t particularly helpful if I want to investigate performance for specific customers, so I need to augment the dataset with the Account and Contact details. The first thing I need to do is extract the Account and Contact data to interim datasets:

    "Extract_Contacts":{
        "action":"sfdcDigest",
        "parameters":{
            "object":"Contact",
            "fields":[
                {
                    "name":"Id"
                },
                {
                    "name":"Name"
                }
            ]
        }
    },
    "Extract_Accounts":{
        "action":"sfdcDigest",
        "parameters":{
            "object":"Account",
            "fields":[
                {
                    "name":"Id"
                },
                {
                    "name":"Name"
                }
            ]
        }
    }

 Once I have the Account/Contact datasets, I can augment the interim Case dataset, first with the contact name. Note that I have to specify the “Extract_Cases” interim cases dataset as the “left” parameter value and the “Extract_Contacts” dataset as the “right”. the left/right_key parameters define the fields from each dataset that tie the contacts to the cases, The results of the transformation are stored in the interim dataset “Transform_Augment_CaseWithContactDetails" :

    "Transform_Augment_CaseWithContactDetails":{
        "action":"augment",
        "parameters":{
            "left":"Extract_Cases",
            "left_key": [ "ContactId" ],
            "relationship": "CaseContact",
            "right":"Extract_Contacts",
            "right_key": [ "Id" ],
            "right_select":[
                "Name"
            ]
        }
    }

Next, I augment the Account name - note that the “left” parameter dataset value is “Transform_Augment_CaseWithContactDetails” - the dataset created after augmenting with the contact name.  If I use the original “Extract_Cases” dataset I discard the contact information I’ve worked so hard to add. This is something I have real trouble remembering for some reason!

    "Transform_Augment_CaseWithAccountDetails":{
        "action":"augment",
        "parameters":{
            "left":"Transform_Augment_CaseWithContactDetails",
            "left_key": [ "AccountId" ],
            "relationship": "CaseAccount",
            "right":"Extract_Accounts",
            "right_key": [ "Id" ],
            "right_select":[
                "Name"
            ]
        }
    }

Now that the Account/Contact information has been added to the Cases, I can register the fully augmented dat set so that it can be used in the Analytics Cloud: 

    "Register_Dataset_ClosedCases":{
        "action":"sfdcRegister",
        "parameters":{
            "alias":"AllCases",
            "name":"AllCases",
            "source":"Transform_Augment_CaseWithAccountDetails"
        }
    }

I then upload the Dataflow via the same drop down that I downloaded it from:
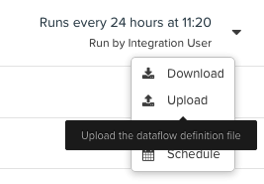
Screen Shot 2015 04 04 at 17 20 42

and then choose the Start option from the same menu to execute the load:

Screen Shot 2015 04 04 at 17 27 10

Once the dataset is loaded, I receive an email notification and I can then start exploring it, for example to see the average days worked for cases grouped by customer:

Screen Shot 2015 04 04 at 17 23 43

(I can only show the BrightGen figure as this dataset contains real customer data!)

Related

Tuesday, 24 March 2015

Lightning Strikes the Trails

Lightning Strikes the Trails

Lightning london

Overview

Just in time for Lightning Developer Week around the globe, new Lightning modules were released for Trailhead including one for Lighting Components. Up until now, most of the content on Trailhead has been subjects that i’m very familiar with (although that hasn’t stopped me dropping points through not reading the challenges properly :) 

The Lightning Components was a different experience - as these have not long made it into beta, and more importantly still don’t play nicely with canvas apps, I’d been dabbling at best, mainly around follow along tutorials where I didn’t have to concentrate too hard.  The Trailhead challenges get you to write real code against a set of requirements and then automatically validates whether you’ve succeeded.

We’re not in Kansas any more

This is really useful as Lightning Components present a different programming challenge to the Apex/Visualforce paradigm we’ve used in the past:

  • The majority of the code is in JavaScript. This will no doubt scare a few old school developers who think anything not related to presentation should be handled by the server, but its the future - of that I have no doubt.
  • The Apex that you do use is stateless - if you don’t send information from the front end as a parameter, the controller won’t have access to it.
  • Communication between components is via JavaScript events.  This is awesome.  Previously to communicate between Visualforce components you had to pass instances of a parent page or component controller around so that they could know there was something there to communicate with. Where this is really powerful is in the Lightning App Builder, as I demonstrated at the London Lightning Developer week by dropping two components into the app builder which were able to communicate with each other without any further wiring up. 

The Lighting module has a guide time of four hours, which is a pretty good estimate.  This isn’t something you’ll want to dip into for 5 minutes here and there. Its also a good idea to have the Lighting Components Developer’s Guide open while you are working it, so that you can read more around the various concepts.

Debugging JavaScript - oh the humanity

There are currently 9 steps in the Lightning Components module. In addition to the steps that cover the points I’ve made above, there’s one that I’d like to particularly draw attention to: Debugging Your Components - this will stand you in good stead when you apply the learning from the module to build your own components when they inevitably don’t work.

Douglas Crockford described browsers as “the most hostile software development environment imaginable” and he should know!  Knowing the tools that are available and how to use them will make things a little easier on you.

So what’s keeping you?

As Columbo would say, just one more thing: if you haven’t tried Trailhead yet,consider how much content is now available and hazard a guess at how much you’d have to pay for that sort of training elsewhere. If that isn’t a reason to get started straight away I don’t know what is.

Related Posts

Saturday, 21 February 2015

Getting Started with Salesforce Wave

Getting Started with Salesforce Wave

Introduction

Salesforce Wave, aka the Analytics Cloud, was the major new product launched at Dreamforce 14. Over the last month or so I’ve had a chance to try it out, thanks to the MVP program and the fact that I work for BrightGen, a Salesforce Platinum Partner here in the UK.

Setting Up

Setting up Wave is straightforward, mostly setting up and assigning permission sets, and covered in detail in the Salesforce Help.

Loading Data

Obviously its rather difficult to use an analytics product without data, and Wave provides a number of mechanisms to import your data.  For the purposes of this post I’m ignoring the ETL providers (Informatica, Jitterbit, Mulesoft etc), instead I’m focusing on those provided by the platform or tools created by Salesforce.

The product is still pretty new, so there isn’t a particularly fancy UI for loading data yet, although I’m sure this will be coming shortly.  Personally, this is the way I prefer things - I’d much rather get access to the functionality as soon as I can, rather than waiting for a funky user interface. 

Importing a CSV File 

The simplest way to load data is to import a CSV file. A good source of sample data is the Government Statistical data sets page. In this post I’m using the Land Registry Price Paid current month data, which provides 87,000 rows of data (Data produced by Land Registry © Crown copyright 2014). This only contains the raw data, so I need to add a header row at the top of the file based on the column headers. The first few column headers are shown below:

Screen Shot 2015 02 21 at 14 20 37


 Navigate to the Analytics app home page and click the Create button and choose Dataset from the drop down (there might be other options depending on your permissions):

Screen Shot 2015 02 21 at 11 44 04

from the resulting page, choose the CSV option:

Screen Shot 2015 02 21 at 11 49 48

and select the file to upload :

Screen Shot 2015 02 21 at 11 59 48

Note that the upload section also mentions a JSON Metadata File - this is optional, but without it each column in the file will be assumed to be a dimension, which means that I’ll only be able to show the record count matching particular criteria, whereas I’m more interested in prices - for example, the total amount paid per county or the average for postcodes near me.  Providing a schema file allows me to specify that the price column contains a measure by setting its type to ’Numeric’:

Screen Shot 2015 02 21 at 14 26 27


The full schema file can be accessed here. (I didn’t create this by hand, in case you were wondering, it was auto generated by a nifty tool that I’ll cover in a later blog post once the Analytics Cloud External API is out of pilot).

Finally, I specify the name for the dataset and the application (essentially a folder) to store it in - I’ve called this ‘December_Price_Paid’ and stored it in ‘My Private App’ - which is totally private to me, much like the private workspace in CRM Content.. Clicking Create Dataset uploads the file and queues it for processing - the message says that this can take up to an hour, but much depends on what other activity is taking place. I uploaded this on a Saturday morning and it took about 3 minutes to be processed.

Exploring a Dataset

Once the data set is loaded, it appears in the list of datasets for the specified application:

Screen Shot 2015 02 21 at 14 30 23

Clicking on the dataset takes me to the basic view, which displays the total number of records:

Screen Shot 2015 02 21 at 14 32 28

Nothing particularly interesting so far, but simply clicking on the ‘Measure’ and changing this to the sum of price paid:

Screen Shot 2015 02 21 at 14 33 43

gives me the total spend for the month - nearly 23 Billion (did I mention the UK housing market is crazy?):

Screen Shot 2015 02 21 at 14 35 10

now I can start to see the real power of Wave - simply creating a grouping by County allows me to view the total spend per county in a couple of clicks and see the total spend for Essex, where I live:

Screen Shot 2015 02 21 at 14 37 21

I can then drill into Essex by district and change the measure to show the average price paid per property to find out how much people are prepared to pay to live here:

Screen Shot 2015 02 21 at 14 41 07

Now I could probably load this data into Salesforce and build out reports and dashboards to show the same data, but it would take me a lot longer than the few minutes I spent setting up this dataset and exploring it, plus if I wanted to look at the data slightly differently I’d need to build a new set of reports/dashboards, whereas with Wave I just return to the base dataset view and change my measures, grouping and filters.  

What the screen shots above don’t do justice to is the speed of Wave, so here’s a real time video showing the steps I’ve described above - its pretty impressive, I’m sure you’ll agree, especially as this is taking place over an internet connection of 4.7 Mbps:

 Note that all of the querying takes place on the server, so this involves genuine round trips - a testament to the power of the Wave query engine and the data compression that is achieved.

Saturday, 7 February 2015

Lightning Process Builder and Invocable Methods

Lightning Process Builder and Invocable Methods

Overview

The new Lightning Process Builder (which I’ve take to calling workflow on steroids) goes GA with the Spring 15 release, introducing a greater number of declarative actions that can be taken when a record matches specified criteria:

  • Create a record (not just tasks!)
  • Update any related record (not just immediate parent)
  • Launch a headless flow
  • Quick action
  • Send an email
  • Post to chatter
  • Submit record for approval

If the above actions don’t cater for your particular requirements, you have the final and killer action:

  • Execute Apex method

This allows you to execute custom Apex code, and once you are in Apex-land you can do pretty much anything you need to.

@InvocableMethod Annotation

In order to allow an Apex method to be executed as a Process Builder action, you need to use the @InvocableMethod annotation. 

Example

Here’s an example of using an invocable annotation that I built for the BrightGen Spring 15 Salesforce Release Webinar around account validation. There are a couple of processes involved.

Process 1 - Create Validation Tasks

When an account is created that is unvalidated, send emails to key users asking them to validate the account:

Screen Shot 2015 02 07 at 11 51 44

Process 2 - Clean up Validation Tasks

Once the account is changed to validated, delete the task records - this involves invoking an Apex method as there is no action to delete a record (although hopefully this is something that will be introduced in a  future release):

Screen Shot 2015 02 07 at 11 56 17

Defining an apex action is straightforward - simply choose the Action Type of ‘Apex’, give the action a name and then choose from the available classes that contain methods annotated with @InvocableMethod:

Screen Shot 2015 02 07 at 11 57 34

Apex Method

The TaskUtils task contains a single method that is passed the id(s) of the accounts whose validation tasks are to be deleted, locates the validation tasks based on their name and deletes them:

public class TasksUtils
{
    @InvocableMethod
    public static void AccountValidated(List<Id> accountIds)
    {
        List<Task> tasks=[select id from Task
                          where whatId in :accountIds
                          and Subject = 'Validate Account'];

        delete tasks;
    }
}

Creating an account that is unvalidated automatically adds 2 tasks:

Screen Shot 2015 02 07 at 12 06 13

and updating the record to validated automatically deletes these tasks:

Screen Shot 2015 02 07 at 12 06 23

Comparison With Trigger

Looking again at the Apex method, there no code aside from that to locate the tasks and delete them:

public static void AccountValidated(List<Id> accountIds)
{
    List<Task> tasks=[select id from Task
                      where whatId in :accountIds
                      and Subject = 'Validate Account'];

    delete tasks;
}

To achieve the same thing with a trigger, I’d need to embed the business logic that determines whether the Validated field for the trigger accounts has been changed to true, then continue on with the code to locate the tasks and delete them.

This is less than ideal, as :

  • business logic encapsulated in triggers is resistant to change. To alter the logic I need to update the trigger code in a sandbox and then deploy to production. 
  • to allow an administrator to disable the trigger on demand I’d need to use something like a custom setting and add code to retrieve and check the value of the setting before continuing with the trigger code.
  • Its a little less testable, as to test the trigger I have to insert a record, and there may be other trigger logic in place that affects the record, leading to more of an integration than unit test. With well-written triggers that delegate to helper classes this isn’t much of a downside, but testing the simple invocable method fits the definition of unit testing perfectly.

So would there be any reason to continue to use triggers once Spring 15 is live?  The answer is yes, for much the same reason that you might have used triggers to in place of workflow in the past - order of execution.  It’s still not possible (as far as I’ve been able to find out anyway!) to define the order in which processes for the same object will execute, whereas in triggers its straightforward to define the order that processing will take place as long as you adhere to the one trigger per object and action pattern.

Tuesday, 3 February 2015

Head for the New Trails

Head for the New Trails

Screen Shot 2015 02 03 at 17 57 15

Trailhead was launched at the Dreamforce 14 Developer keynote, and the contact has remained fairly static for the last couple of months. That all changed today with the launch of two new modules and enhancements to a number of existing challenges. In my usual selfless fashion I dived in and completed the new modules and updated challenges, so that my readers would be fully prepared to tackle them.

New Module - Data Security

The Data Security module is part of the Getting Started with the Force.com Platform trail. To my mind there are two aspects to this topic :

  • Making sure that users only see the records they need to do their job. In other words, protecting data from unauthorised or unnecessary access.
  • Making sure that users can see the records they need to do their job. Locking things down too tightly often results in duplicate records, as users don’t have access to the record that already exists.

In my experience this is one of the more difficult concepts for users, administrators and developers to grasp. Its also key, especially if you are planning to attempt any of the Salesforce certifications - understanding how to lock down and open up access to data forms part of every certification, from Administrator through to Technical Architect. A good understanding of the concepts will stand you in good stead for years to come.

New Module - Change Management

The Change Management module is part of the Intro to Visual App Development trail and covers both the processes and available tools for managing change in your Salesforce instance. Whether you are an administrator/developer for an end user or a consultant, this is an important topic to master. Defending your production instance from configuration or code that has not been fully thought through or tested will save you a lot of grief and rework in the long run, and your users will be grateful for a solid environment to work in.

Enhanced Challenges

When Trailhead originally launched, a number of challenges consisted of confirming that you had read and understood the information presented for 100 points. While there’s nothing particularly wrong with this, it does lead to easy points and is a little open to abuse. In the latest iteration these challenges have been upgraded to 500 points, but also require you to carry out configuration or development in your trailhead developer edition:

  • Visualforce Basics - these challenges now require you to build functioning Visualforce pages tied to data in your developer edition
  • Apex Testing - these challenges now require you to build working unit tests to cover code provided by the challenge. I’m particularly pleased to see this, as testing is still something that seems to confuse or scare a lot of people, judging by the cries for “help me write the test class” on the discussion boards and stack exchange

New Challenge Type

The final enhancement on the challenges front is a new type of challenge - multiple choice questions at the end of the module step to ensure you fully understand the concepts. The points on offer drop each time you try the questions and fail, and my advice would be to read the questions properly! I dropped a few points through missing the key word in a question.

Related Posts


Saturday, 10 January 2015

Certified Pardot Consultant

Screen Shot 2015 01 10 at 17 48 35

(Please don’t ask for specifics on the exam questions, as this would breach the test taker agreement and devalue the exam for everyone)

Towards the end of 2014, the Salesforce certification portal gained a new track - Pardot Consultant. As anyone who knows Bob Buzzard knows, certifications are my Everest - I have to take them on because they are there, and this was no different.

In fact, it was pretty different - at BrightGen we have customers that use Pardot, so I have experience of implementations, but its not my primary focus so I needed to do some serious studying to make sure that I’d covered all the bases. As a Salesforce Platinum Partner (and as an MVP) I get access to the Premier Training Catalog, which has around 16 hours of interactive Pardot training, so that was my run up to Christmas taken care of.  There’s also a huge amount of information that is publicly available in the Pardot Knowledgebase.

The exam format will be familiar to anyone that has taken a Salesforce certification before, accessed via webassessor with 60 multiple choice questions.  The exam is 90 minutes and the pass mark is 70%, which is a little tougher than the sales/service cloud exams which are 105 minutes with a 68% passing mark.

One area where the exam felt different to the others that I’ve taken (apart from Technical Architect) was the detailed reference information that I had to know - its not just a matter of knowing the concepts or features of Pardot, My thinking is that this is because Pardot is an application rather than a platform (unlike Salesforce) which reduces the breadth of the exam and this is countered with increased depth.  I know this isn’t the greatest explanation, but if I go into details I’ll be giving away information about the specifics of the exam, which would breach the test takers agreement.

The study guide is spot on in terms of the areas that you need to cover, and here’s a few more tips from my experience:

  • Pardot has a large number of connectors available, and you should know how to setup and use each of these in detail
  • It also has a large number of completion/page actions - you’ll need to understand the purpose of each of these, when they execute, and identify the appropriate setup for specific scenarios
  • Knowing Pardot is not enough - much like the Sales and Service cloud exams you need industry knowledge around the certification, in this case marketing automation strategies, targets and metrics.

The other key piece of advice I’d give is to make sure that you read the question thoroughly - when I reviewed my exam prior to submission I found that I’d completely misunderstood two or three questions and picked the opposite answer to the one that was (I believe) correct.  

I put more time into studying for this exam than any others apart from Advanced Developer and Technical Architect, but it was worth it as on 30th December I gained the Pardot Consultant certification and am once again Salesforce Certified Everything.

Related Posts

Tuesday, 6 January 2015

New Year, New Job - Opportunities at BrightGen

Ht

Now that 2015 is a few days old, I have no doubt that many people are back at their place of employment and wishing they were elsewhere. The first Monday of the New Year is typically the busiest day of the year for job searches and January, in turn, is the busiest month.

If you are in the Salesforce space, or a developer who would like to be in the Salesforce space, it couldn’t be easier to take the first step to a new career - simply come along to the Opportunities at BrightGen event in Salesforce Tower on Wednesday 21st January. Building on the success of our previous Meet the Team event, this time we are focused on attracting and recruiting new staff.  We’re looking for Project Leads/Managers, Technical Leads and Apex/Visualforce Developers at all levels.

We’ll have a few short “day in the life” talks to give you a flavour of what its like to work for a top Platinum Partner, plus a host of employees from all functional areas and levels to answer any specific questions that you might have. We’ll also have beer and pizza and a great view of London from our 18th floor offices.

You can sign up for the event at our landing page - space is limited so sign up today.